How to configure Microsoft Entra ID integration
Configuration: DOC -> Administration -> Accounts -> Microsoft Entra ID
For information on using the Microsoft Entra ID integration, please refer to this overview page.
By integrating Microsoft Entra ID, selected groups and their members are synchronized from Microsoft Entra ID to DriveLock. Please follow some configuration steps in Microsoft Entra ID first and then add the generated data to the corresponding text boxes in the DriveLock Operations Center (DOC).
You will need to copy some data during configuration. We recommend opening a text file in which you save the following information:
Primary domain, Tenant ID, Application ID, Client secret value
Please do the following:
-
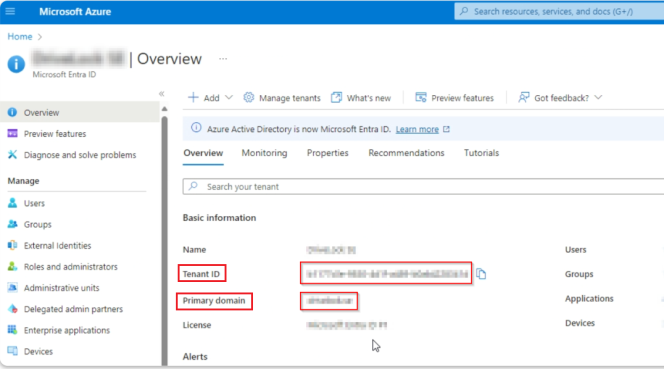
Log in to your Azure portal and select Microsoft Entra ID in the Azure services.
-
On the Overview start page, copy the entries in the Tenant ID and Primary domain fields and paste the copies into your open text file.
-
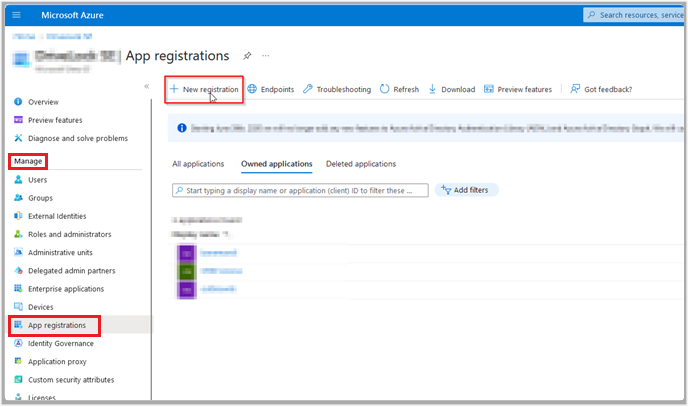
Then click on App registration in the Manage menu and select New registration.
-
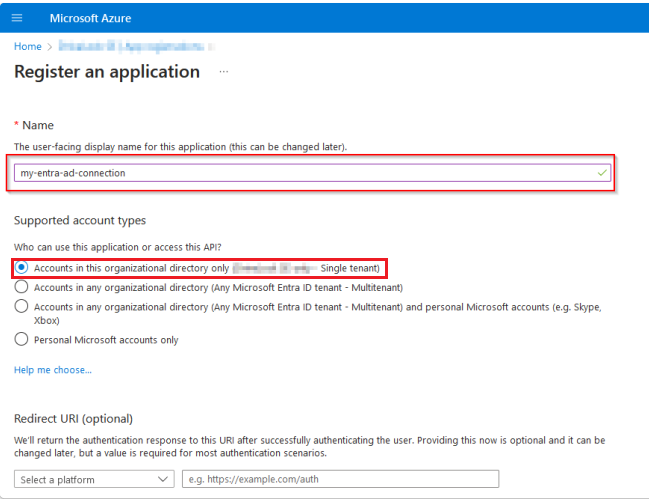
Register the application by entering a descriptive name and select the option [...] single tenant under Supported account types. In the example below, the name is 'my-entra-ad-connection'. Click Register to create the application.
-
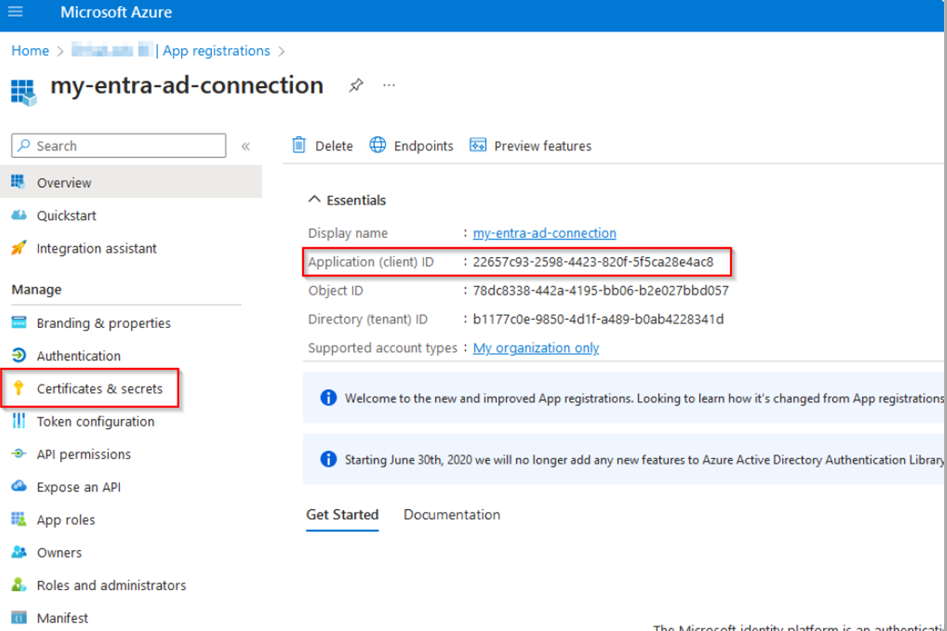
You will then be redirected to the App registrations page. Copy the application ID and paste it into your text file.
In the example below, the application ID has the value 22657c93-2598-4423-820f-5f5ca28e4ac8.
-
Next, create a new secret client key. To do so, select the New client secret option in the Manage menu under Certificates & secrets.
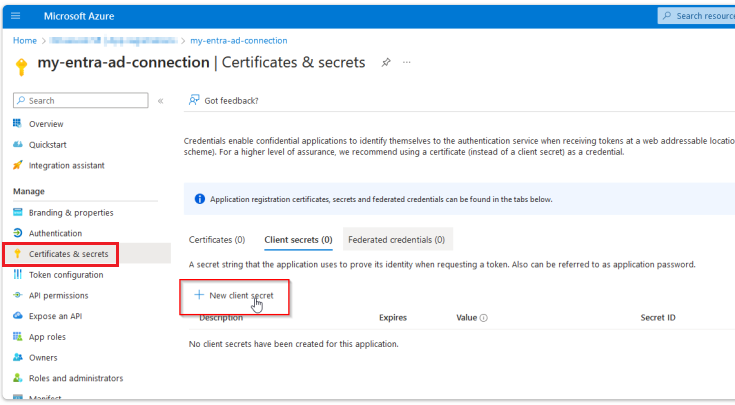
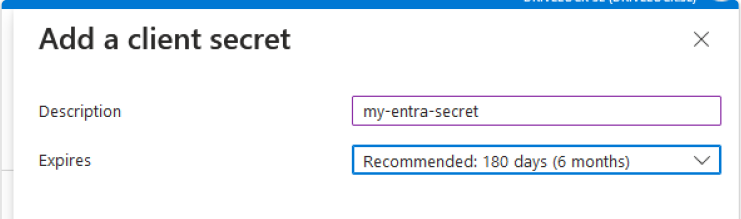
-
Create a new client secret with a name and an expiration date.
In the example, the client secret my-entra-secret is valid for 6 months.
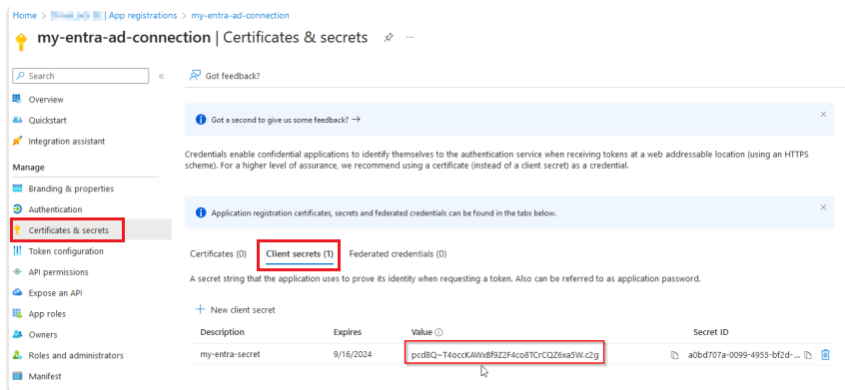
-
The client secret is now displayed under Client secrets. Copy the value and save it in a safe location. Please note that this value is only displayed once!
In the example below, the value is pcd8Q~T4occKAWxBf9Z2F4co8TCrCQZ6xa5W.c2g.
-
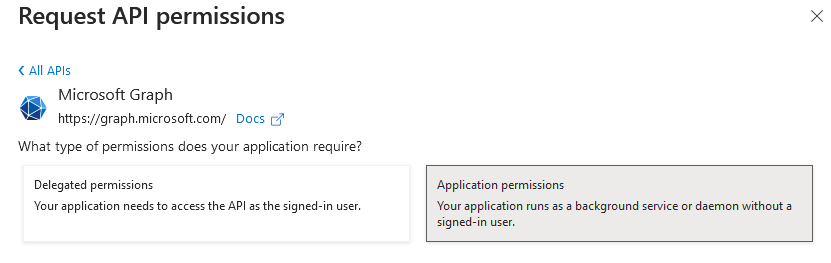
Next, set the API authorizations. To do s, open API permissions in the Manage menu.
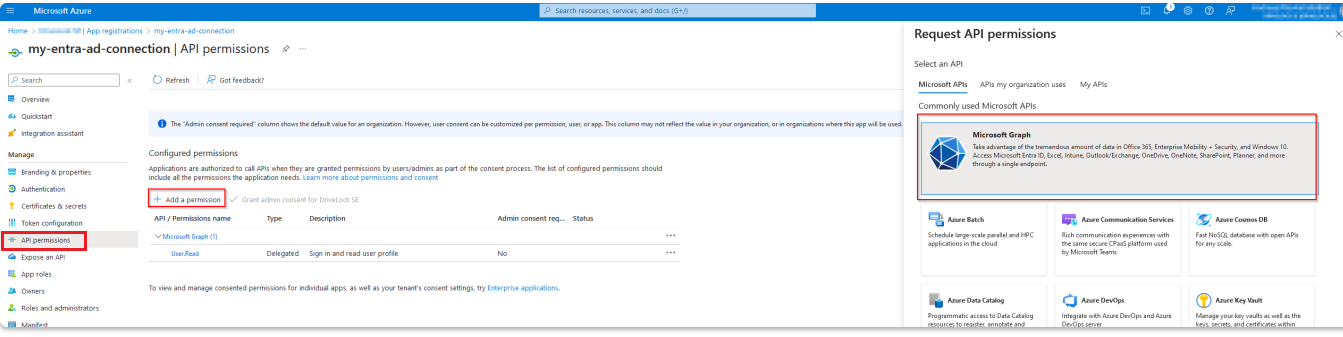
-
Select Add a permission and the Microsoft API Microsoft Graph provided on the right. Here you select Application permissions as the authorization type.
-
Use the search function to search for Directory and then select the entries Device.Read.All, Group.Read.All and User.Read.All.
-
Your authorizations should now be set up as follows. Make sure that Grant admin consent is granted.

-
Save your entries and close the Azure Portal. Then go to the DriveLock Operations Center (DOC).
-
You now need your copied details in the text file.
-
In the Administration menu, open the Accounts submenu and go to Microsoft Entra ID. Click on the
 icon to add your new configuration.
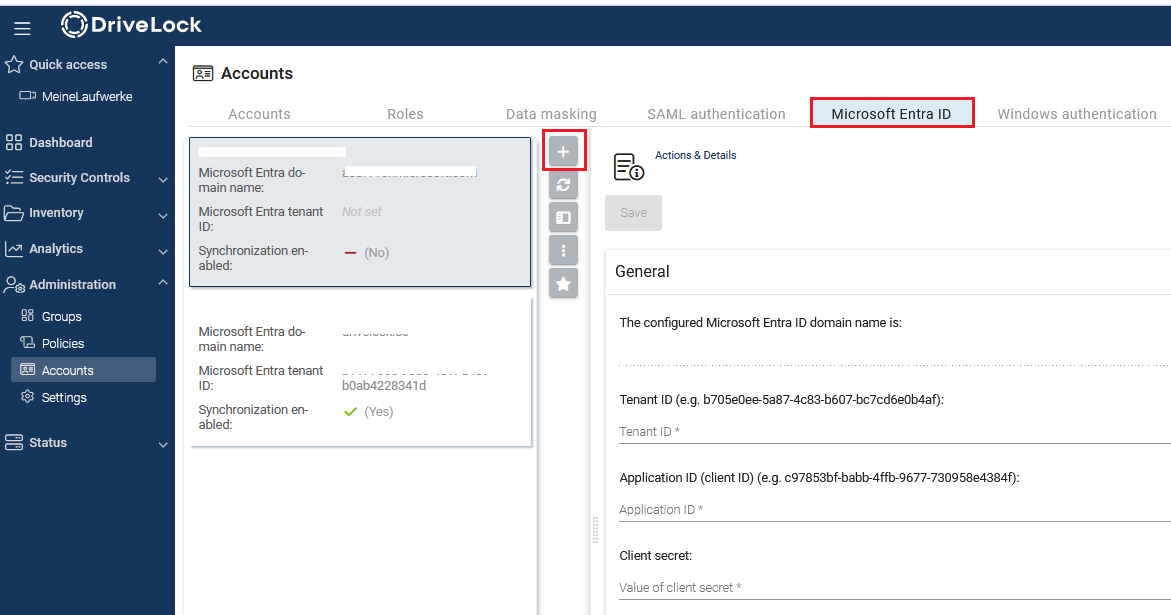
-
Enter your Primary domain as the Microsoft Entra ID domain name, click OK and save your configuration.
-
Enter your Tenant ID, Application ID and your Client secret below.
-
You can then test your connection.
-
Then select the groups you want to synchronize. Microsoft Entra ID synchronization includes all groups and the subgroups they contain. To do so, check the box next to Enable Microsoft Entra ID synchronization.
The synchronization takes place as follows:
-
once a day by default,
-
by right-clicking on a Microsoft Entra ID group and clicking the menu command Synchronize with Microsoft Entra ID now or
-
by selecting a Microsoft Entra ID group in the group management and clicking the menu command Synchronize with Microsoft Entra ID now.
If you want to manage the groups completely on the Microsoft Entra ID side, we recommend creating a "Microsoft Entra ID Sync Group" that includes all the groups you want to synchronize. Then you only select this group on the DriveLock side.
-
-
You can optionally create a SAML configurationwith the Microsoft Entra ID configuration. This allows you to log in with Microsoft Entra ID users who have been assigned rights via membership of a Microsoft Entra ID group.