Using Microsoft Entra ID for SAML SSO
Configuration: DOC -> Administration -> Accounts -> SAML authentication
Before you can use Microsoft Entra ID for single sign-on with SAML, a few configuration steps are necessary.
You will need to copy some data during configuration. We recommend opening a text file in which you save the following information: redirection URL, content of the XML file, application ID, etc.
Please do the following:
-
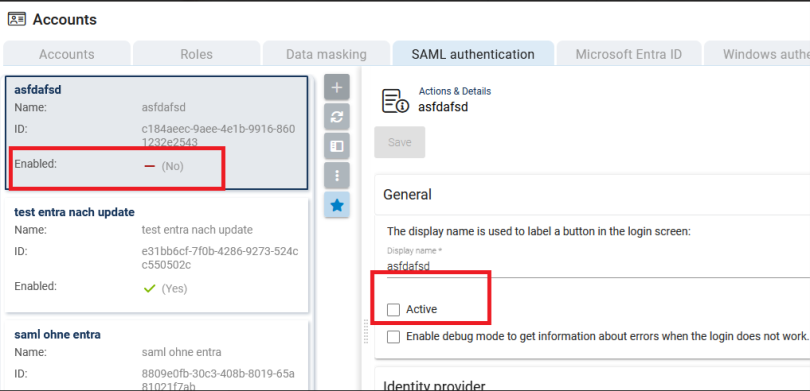
Open the SAML authentication tab in the DOC under Accounts and create a new SAML configuration.
-
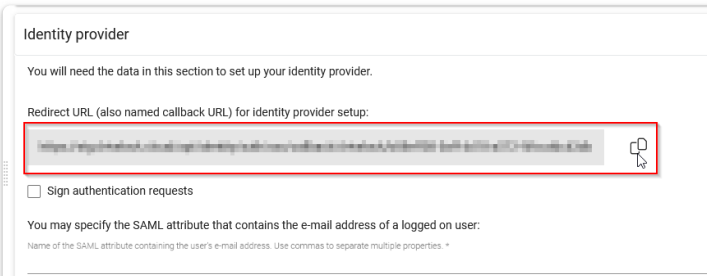
In the Identity Provider section, copy the redirect URL (or callback URL) for the identity provider settings into your text file.
-
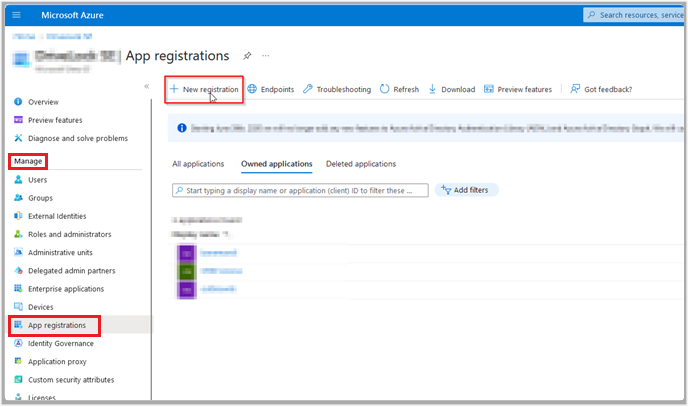
Log in to your Azure portal and select Microsoft Entra ID in the Azure services.
-
Open the App registrations menu under Manage on the Overview start page and select New registration.
-
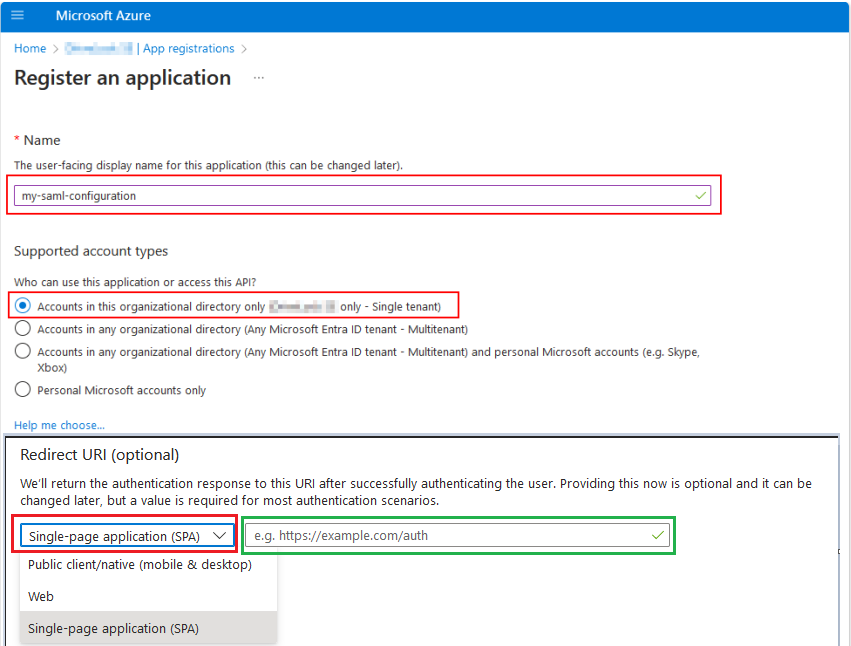
Register the application by entering a descriptive name and select the option [...] Single tenant under Supported account types. In the example below, the name is 'my-saml-configuration'. Also select the option Single-page application (SPA) under Redirect URI (optional) and then copy the redirect URL from your text file into the field outlined in green.
Then click on the Register button.
-
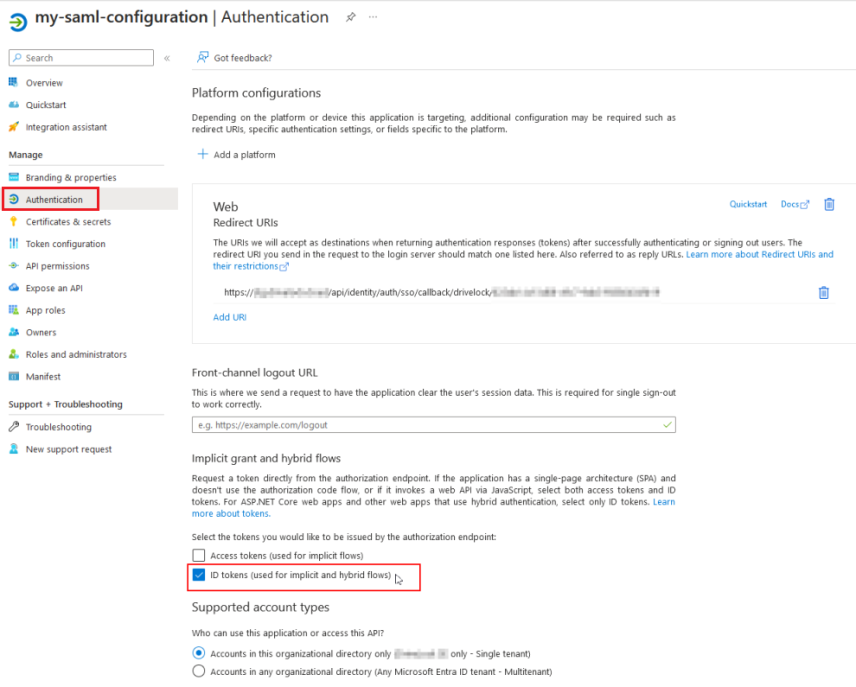
Once the application has been created, you will be redirected to the App registrations start page. Select the Authentication menu item. Here you can check the redirect URL and adjust it if necessary. Check ID tokens (see figure) and save your settings.
-
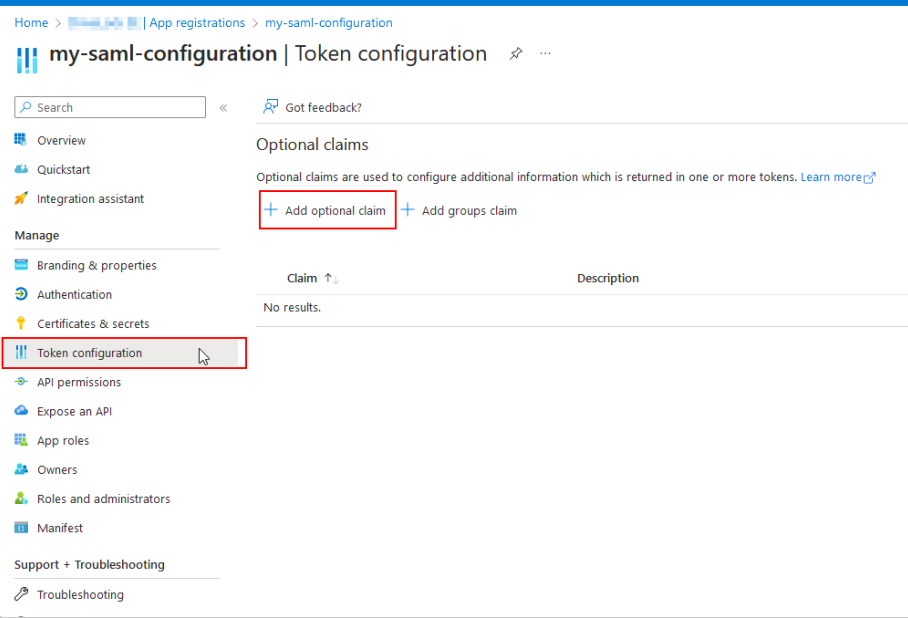
Next, open the Token configuration menu item. Here you select Add optional claim.
-
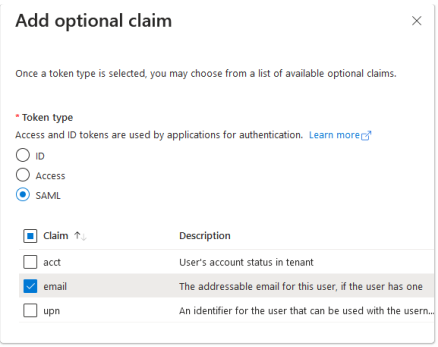
Select the following options in the Add optional claim dialog:
-
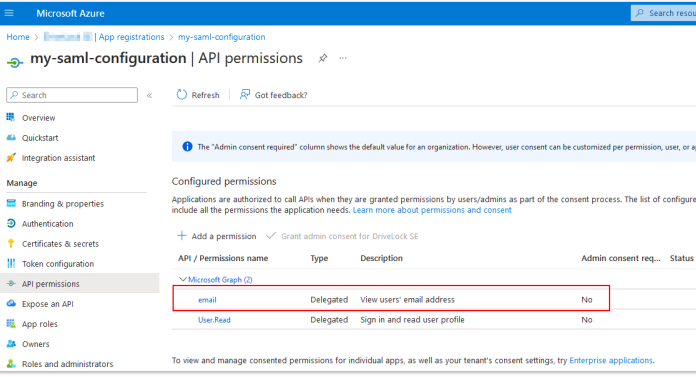
Activate the Microsoft Graph e-mail authorization and then click on Add.
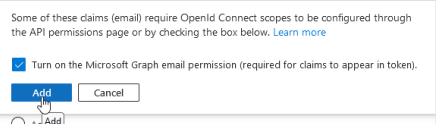
This allows you to set the Graphs authorization directly via the wizard:
-
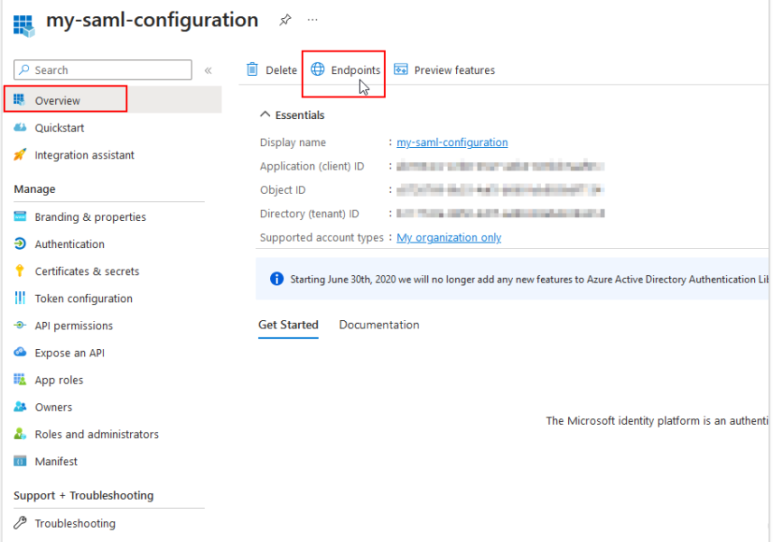
Once you have completed the above steps, click Overview again, which will take you back to the start page of your SAML app registration.
-
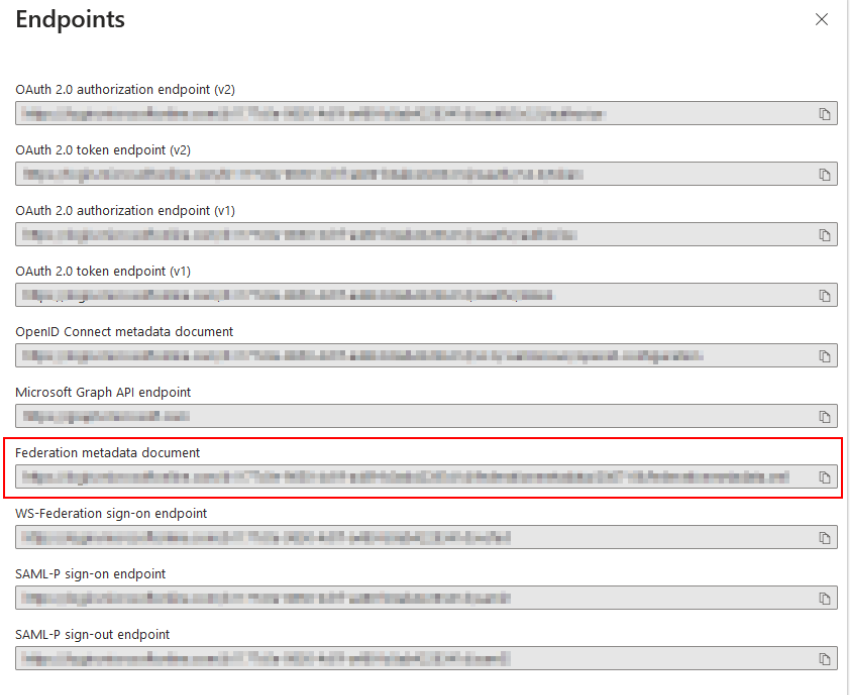
Here, click Endpoints. Various endpoint definitions are displayed.
-
Copy the URL to the XML file under Federation metadata document into your text file.
-
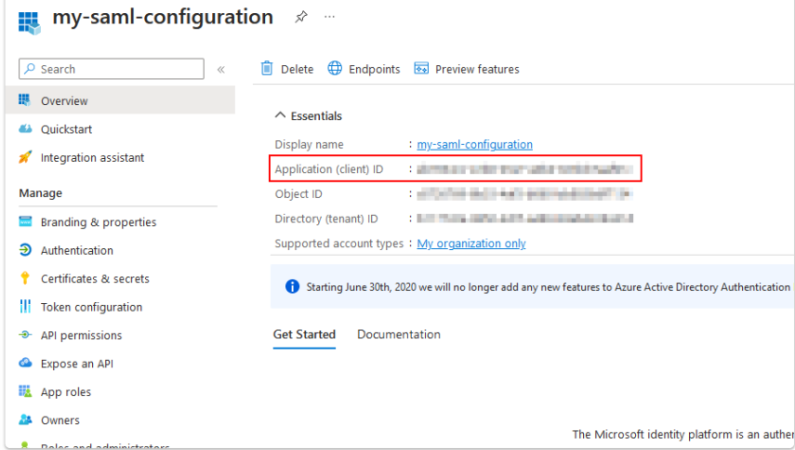
Return to the start page of your SAML app registration and copy the application (client) ID into your text file.
-
The configuration within Azure is now complete and you can now continue with the configuration in the DOC. To do this, go to the SAML authentication tab again (see Point 1).
-
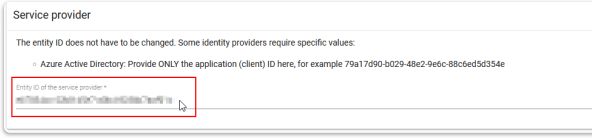
In the Service Provider section, enter the copied Application ID from your text file under Entity ID of the service provider.
-
Finally, in the Identity provider metadata section, insert the URL from your text file and click Import.

-
Make sure that you have set SAML as the active provider by ticking the Active box.
-
Save your SAML configuration.
-
Optional: If you want to use the Microsoft Entra ID integration in addition to the SAML configuration, you can link the SAML configuration you have just created with your Microsoft Entra ID configuration to enable logins via group memberships.